
Step-by-Step Commercial Vehicle Washing Guide: The Best Order to Clean Any Vehicle
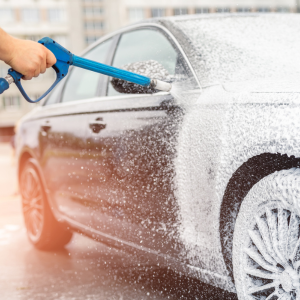
Commercial vehicles work hard every day. From delivery vans and service utes to heavy trucks and construction vehicles, they are constantly exposed to dirt, road grime, grease, brake dust, insects, bird droppings, tree sap, and harsh weather conditions.
Over time, these contaminants don't just make vehicles look dirty—they can gradually damage paintwork, reduce visibility, contribute to corrosion, and create an unprofessional impression of your business.
For businesses, maintaining clean vehicles isn't simply about appearance. It protects your investment, supports preventative maintenance, promotes your brand, and demonstrates professionalism every time a vehicle arrives at a customer's premises.
However, many people unknowingly wash vehicles in the wrong order. Starting in the wrong place or using the wrong techniques can spread dirt across clean surfaces, increase the risk of scratching paintwork, and make the entire process less efficient.
This guide explains the professional order for washing commercial vehicles and shares practical tips to help businesses achieve consistently better results.
Why Washing Order Matters
Many businesses assume washing a vehicle is simply a matter of soap, water, and effort.
In reality, the order in which you clean a vehicle has a significant impact on both cleaning quality and vehicle protection.
Following a structured washing process helps to:
-
Minimise swirl marks and scratches
-
Remove contaminants more effectively
-
Reduce the amount of scrubbing required
-
Improve chemical performance
-
Prevent cross-contamination
-
Increase washing efficiency
-
Extend the lifespan of vehicle finishes
-
Produce consistent results across an entire fleet
When every employee follows the same process, businesses also benefit from improved quality control and easier staff training.
Prepare Before You Start

Good preparation saves time and produces better cleaning results.
Before beginning, gather all the equipment required for the job.
Essential Commercial Vehicle Cleaning Equipment
Depending on your operation, you may need:
-
Commercial vehicle wash detergent
-
Traffic film remover or pre-wash
-
Pressure washer or high-pressure hose
-
Foam cannon or foam gun
-
Two wash buckets with grit guards
-
Soft vehicle wash brushes
-
Wheel brushes
-
Tyre brush
-
Tyre dressing (optional)
Using professional automotive cleaning products designed for commercial vehicles helps improve cleaning performance while reducing the risk of damaging vehicle surfaces.
Step 1: Inspect the Vehicle
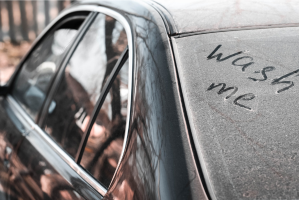
Before introducing water or chemicals, perform a quick inspection.
What to Look For
Check for:
-
Heavy mud build-up
-
Oil or fuel leaks
-
Damaged panels
-
Loose accessories
-
Stone chips
-
Bird droppings
-
Tree sap
-
Tar spots
-
Excessive brake dust
Identifying heavily soiled areas early allows you to adjust your cleaning approach before washing begins.
Step 2: Park in a Suitable Washing Area
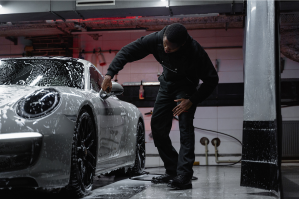
Choose a location that allows the vehicle to be cleaned safely and efficiently.
Ideally, wash vehicles:
-
Out of direct sunlight
-
On a level surface
-
In an area with adequate drainage
-
Away from heavy dust
-
With sufficient space to move around the vehicle
Avoid Washing in Direct Sunlight
Sunlight can cause cleaning chemicals and water to dry too quickly.
This may result in:
-
Water spots
-
Streaking
-
Chemical residue
-
Uneven cleaning
Working in the shade gives cleaning products more time to loosen dirt before rinsing.
Step 3: Pre-Rinse the Vehicle
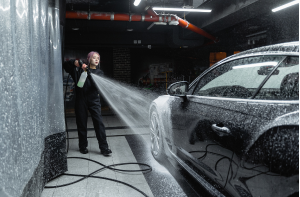
Always begin with a thorough rinse.
The goal is to remove loose dirt before touching the paintwork.
A pressure washer is particularly effective for removing:
-
Dust
-
Sand
-
Loose mud
-
Leaves
-
Road debris
Skipping this step increases the risk of rubbing abrasive particles across the paint during washing.
Focus on High-Contamination Areas
Pay extra attention to:
-
Wheel arches
-
Chassis rails
-
Mud flaps
-
Lower doors
-
Side skirts
-
Rear bumper
-
Tailgate
-
Underbody
Commercial vehicles usually accumulate the heaviest contamination around the lower sections.
Step 4: Apply a Pre-Wash or Traffic Film Remover
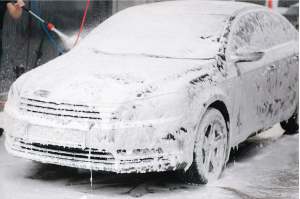
Road grime often bonds tightly to vehicle surfaces.
A quality pre-wash or traffic film remover helps loosen this contamination before hand washing begins.
Allow the Product to Dwell
Apply the product evenly and allow it to work according to the manufacturer's instructions.
Avoid allowing the product to dry on the surface.
The goal is to soften contaminants—not bake them onto the paint.
Step 5: Clean the Wheels and Tyres

Wheels are usually the dirtiest part of the vehicle.
Brake dust, grease, tar, and road grime can contain abrasive particles that should never be transferred onto painted panels.
Use Dedicated Wheel Cleaning Tools
Always keep separate:
-
Wheel brushes
-
Wash mitts
-
Buckets
-
Towels
Using the same wash mitt on wheels and paintwork increases the risk of scratches.
Clean in This Order
-
Tyres
-
Wheel faces
-
Wheel barrels
-
Lug nuts
-
Wheel arches
Cleaning wheels first also prevents dirty water from splashing onto already-clean body panels.
Step 6: Treat Heavy Grease and Stubborn Contamination
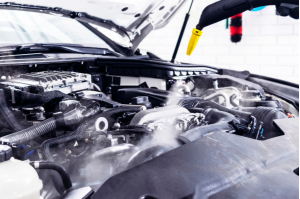
Commercial vehicles often collect grease around:
-
Fuel caps
-
Door hinges
-
Tail lifts
-
Engine compartments (where appropriate)
-
Chassis components
-
Hydraulic equipment
Apply a suitable automotive degreaser to these areas before continuing.
Allow enough time for the product to break down grease before rinsing thoroughly.
Step 7: Wash the Vehicle from Top to Bottom
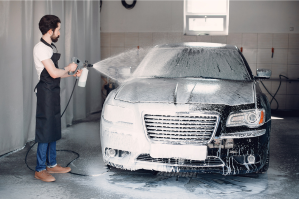
Now it's time for the main wash.
Professional detailers and fleet operators generally work from the cleanest areas to the dirtiest.
Recommended Washing Sequence
-
Roof
-
Windscreen
-
Side windows
-
Bonnet
-
Upper side panels
-
Doors
-
Rear panels
-
Lower body panels
-
Front bumper
-
Rear bumper
-
Side skirts
This prevents dirty water from running over areas that have already been cleaned.
Use the Two-Bucket Method
One bucket should contain clean wash solution.
The second bucket should contain clean rinse water.
After each section:
-
Rinse the wash mitt
-
Remove trapped dirt
-
Return to the clean wash bucket
Adding grit guards helps keep dirt at the bottom of each bucket.
Step 8: Rinse Thoroughly
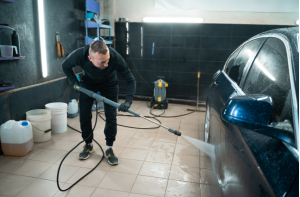
Once every panel has been washed, rinse the vehicle completely.
Take your time.
Any remaining detergent can leave streaks or residue if allowed to dry.
Areas Commonly Missed
Check:
-
Door handles
-
Mirrors
-
Fuel flap
-
Behind number plates
-
Around badges
-
Roof racks
-
Window seals
These details often make the difference between an average wash and a professional finish.
Step 9: Dry the Vehicle Correctly

Many businesses underestimate the importance of drying.
Allowing water to evaporate naturally often leaves mineral deposits and unsightly water spots.
Best Drying Methods
Use:
-
Air blowers where available
-
Dedicated glass towels
Avoid old towels or rough cloths that may scratch paint.
Drying should begin from the roof and work downward, following the same sequence used during washing.
Step 10: Clean the Glass
Crystal-clear glass improves both appearance and driver visibility.
Clean:
-
Windscreen
-
Side windows
-
Rear windows
-
Mirrors
-
Light covers
-
Camera lenses
-
Parking sensors where appropriate
Use a dedicated automotive glass cleaner and a lint-free microfibre cloth for the best finish.
Step 11: Apply Finishing Touches
Once the vehicle is clean and dry, finish with the final details.
Depending on your maintenance programme, this may include:
-
Tyre dressing
-
Plastic trim restorer
-
Spray wax
-
Protective sealant
-
Interior wipe-down
These finishing touches help maintain a professional appearance between major washes.
Step 12: Complete a Final Inspection
Before the vehicle returns to service, perform one final walk-around.
Check For
-
Water spots
-
Missed dirt
-
Streaks
-
Dirty wheels
-
Smears on glass
-
Chemical residue
-
Remaining grease
-
Drips around mirrors and trims
Correcting small imperfections immediately saves time later.
Create a Standard Fleet Washing Procedure
Businesses managing multiple vehicles benefit from creating documented cleaning procedures.
A written process ensures every employee follows the same steps regardless of experience.
Include:
-
Products used
-
Dilution ratios
-
Washing order
-
Drying procedure
-
Safety requirements
-
PPE requirements
-
Inspection checklist
Consistency leads to better cleaning quality and easier staff training.
Common Commercial Vehicle Washing Mistakes
Even experienced operators can develop habits that reduce cleaning quality.
Avoid these common mistakes:
-
Washing in direct sunlight
-
Using household detergents
-
Skipping the pre-rinse
-
Cleaning wheels last
-
Using one bucket
-
Allowing chemicals to dry
-
Reusing dirty wash mitts
-
Using abrasive cloths
-
Ignoring wheel arches
-
Rushing the drying stage
Small improvements in technique often produce significant improvements in results.
Choosing the Right Commercial Vehicle Cleaning Products
The products you choose can have a major impact on cleaning efficiency and vehicle protection.
Look for products that:
-
Remove road grime effectively
-
Are suitable for commercial vehicles
-
Are compatible with pressure washing systems
-
Offer concentrated formulations for better value
-
Leave minimal residue
-
Help protect painted surfaces
-
Deliver consistent performance across different vehicle types
Using high-quality commercial cleaning products can reduce rework, improve productivity, and help maintain your fleet's appearance.
For a deeper understanding of how to select the right products for your operation, explore our article, The Complete Guide to Choosing Commercial Car Wash Chemicals. It breaks down the different types of cleaning agents, explains how they work, and helps you choose solutions that deliver consistent, professional results across your fleet.
Why Regular Commercial Vehicle Washing Matters
A structured washing routine offers more than cosmetic benefits.
Regular cleaning can help:
-
Protect paintwork
-
Improve resale value
-
Reduce long-term maintenance
-
Support fleet branding
-
Improve workplace pride
-
Create a better impression with customers
-
Make routine vehicle inspections easier by removing dirt that may hide damage or leaks
A clean vehicle reflects a well-maintained business.
Professional Automotive Cleaning Products from Insinc
At Insinc, we supply professional automotive cleaning products to businesses throughout New Zealand.
Our range includes commercial vehicle wash detergents, degreasers, microfibre cloths, vehicle brushes, cleaning accessories, and hygiene solutions designed to help businesses maintain cleaner, more professional fleets.
Whether you operate a transport company, construction fleet, courier service, agricultural business, or professional car wash, Insinc can help you choose reliable cleaning products that deliver consistent, high-quality results.
Explore our automotive cleaning range or contact the Insinc team for advice on selecting the right products for your business.
Frequently Asked Questions
What is the correct order to wash a commercial vehicle?
The recommended order is to inspect the vehicle, pre-rinse, apply a pre-wash, clean the wheels and tyres, treat heavy grease, wash from the top down, rinse thoroughly, dry the vehicle, clean the glass, add finishing touches if required, and complete a final inspection.
Why should commercial vehicles be washed from the top down?
Starting at the roof allows dirt and water to flow downward naturally. This prevents contamination of already-clean surfaces and reduces the risk of scratching the paintwork.
How often should fleet vehicles be washed?
The ideal frequency depends on the type of vehicle, operating environment, weather conditions, and level of use. Vehicles operating in construction, agriculture, transport, or coastal environments typically require more frequent washing than office or sales vehicles.
Can I use household detergent to wash commercial vehicles?
Household detergents are not specifically formulated for automotive finishes and may not provide the same level of cleaning performance as commercial vehicle wash products. Using products designed for automotive applications is generally recommended to help protect vehicle surfaces.
Why is the two-bucket method recommended?
The two-bucket method helps keep dirt away from the clean wash solution. Rinsing the wash mitt in a separate bucket before returning it to the wash bucket reduces the chance of rubbing abrasive particles across the paint, helping minimise swirl marks and scratches.
https://www.insinc.co.nz/category/car-vehicle-wash
Posted: Friday 26 June 2026